White Label with Embed Flow
This is an Enterprise feature
You can use Ragie White Label connectors with the OAuth Embed flow so you get the Ragie UI for picking files with your own branding.
For the example below, we'll be using setting up Google Drive. Other providers are similar, but they might have some differences.
This guide will go through the complete process of setting up OAuth credentials. If you already have these, skip to Ragie Setup
Set up
- Contact Ragie to set up a subdomain. For this example, assume it is https://demo.ragie.ai
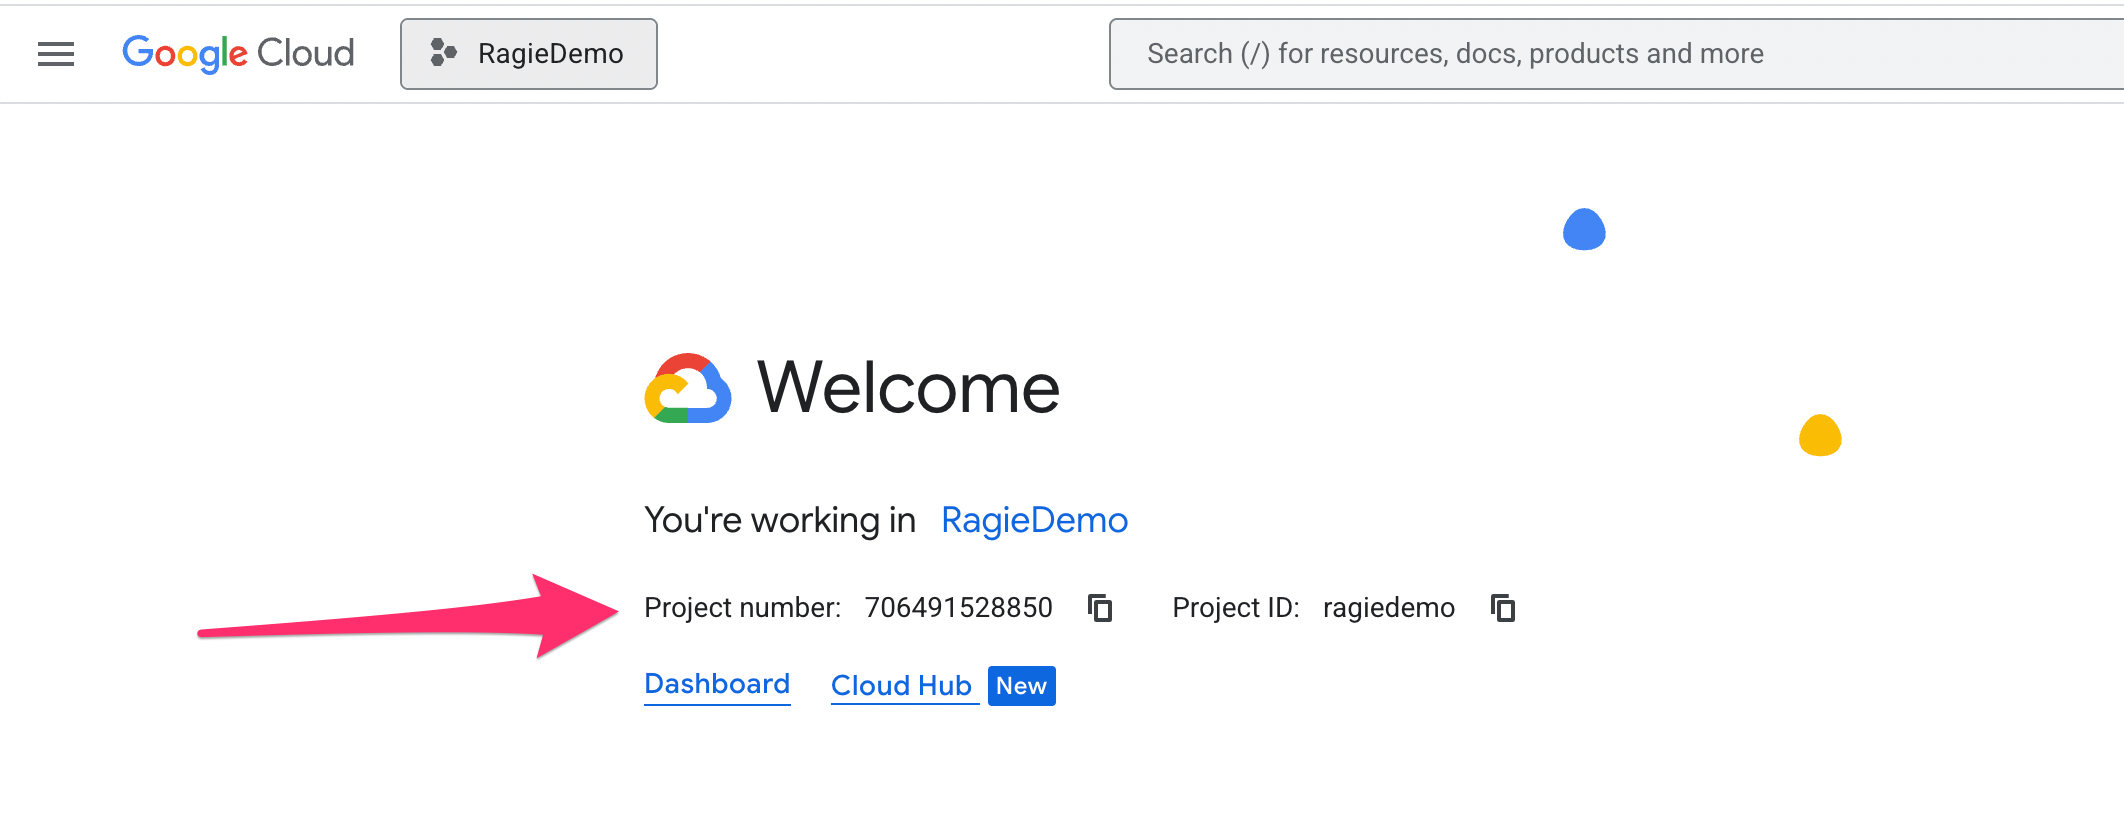
- Create your GCP project
- Get your project number on the project welcome page
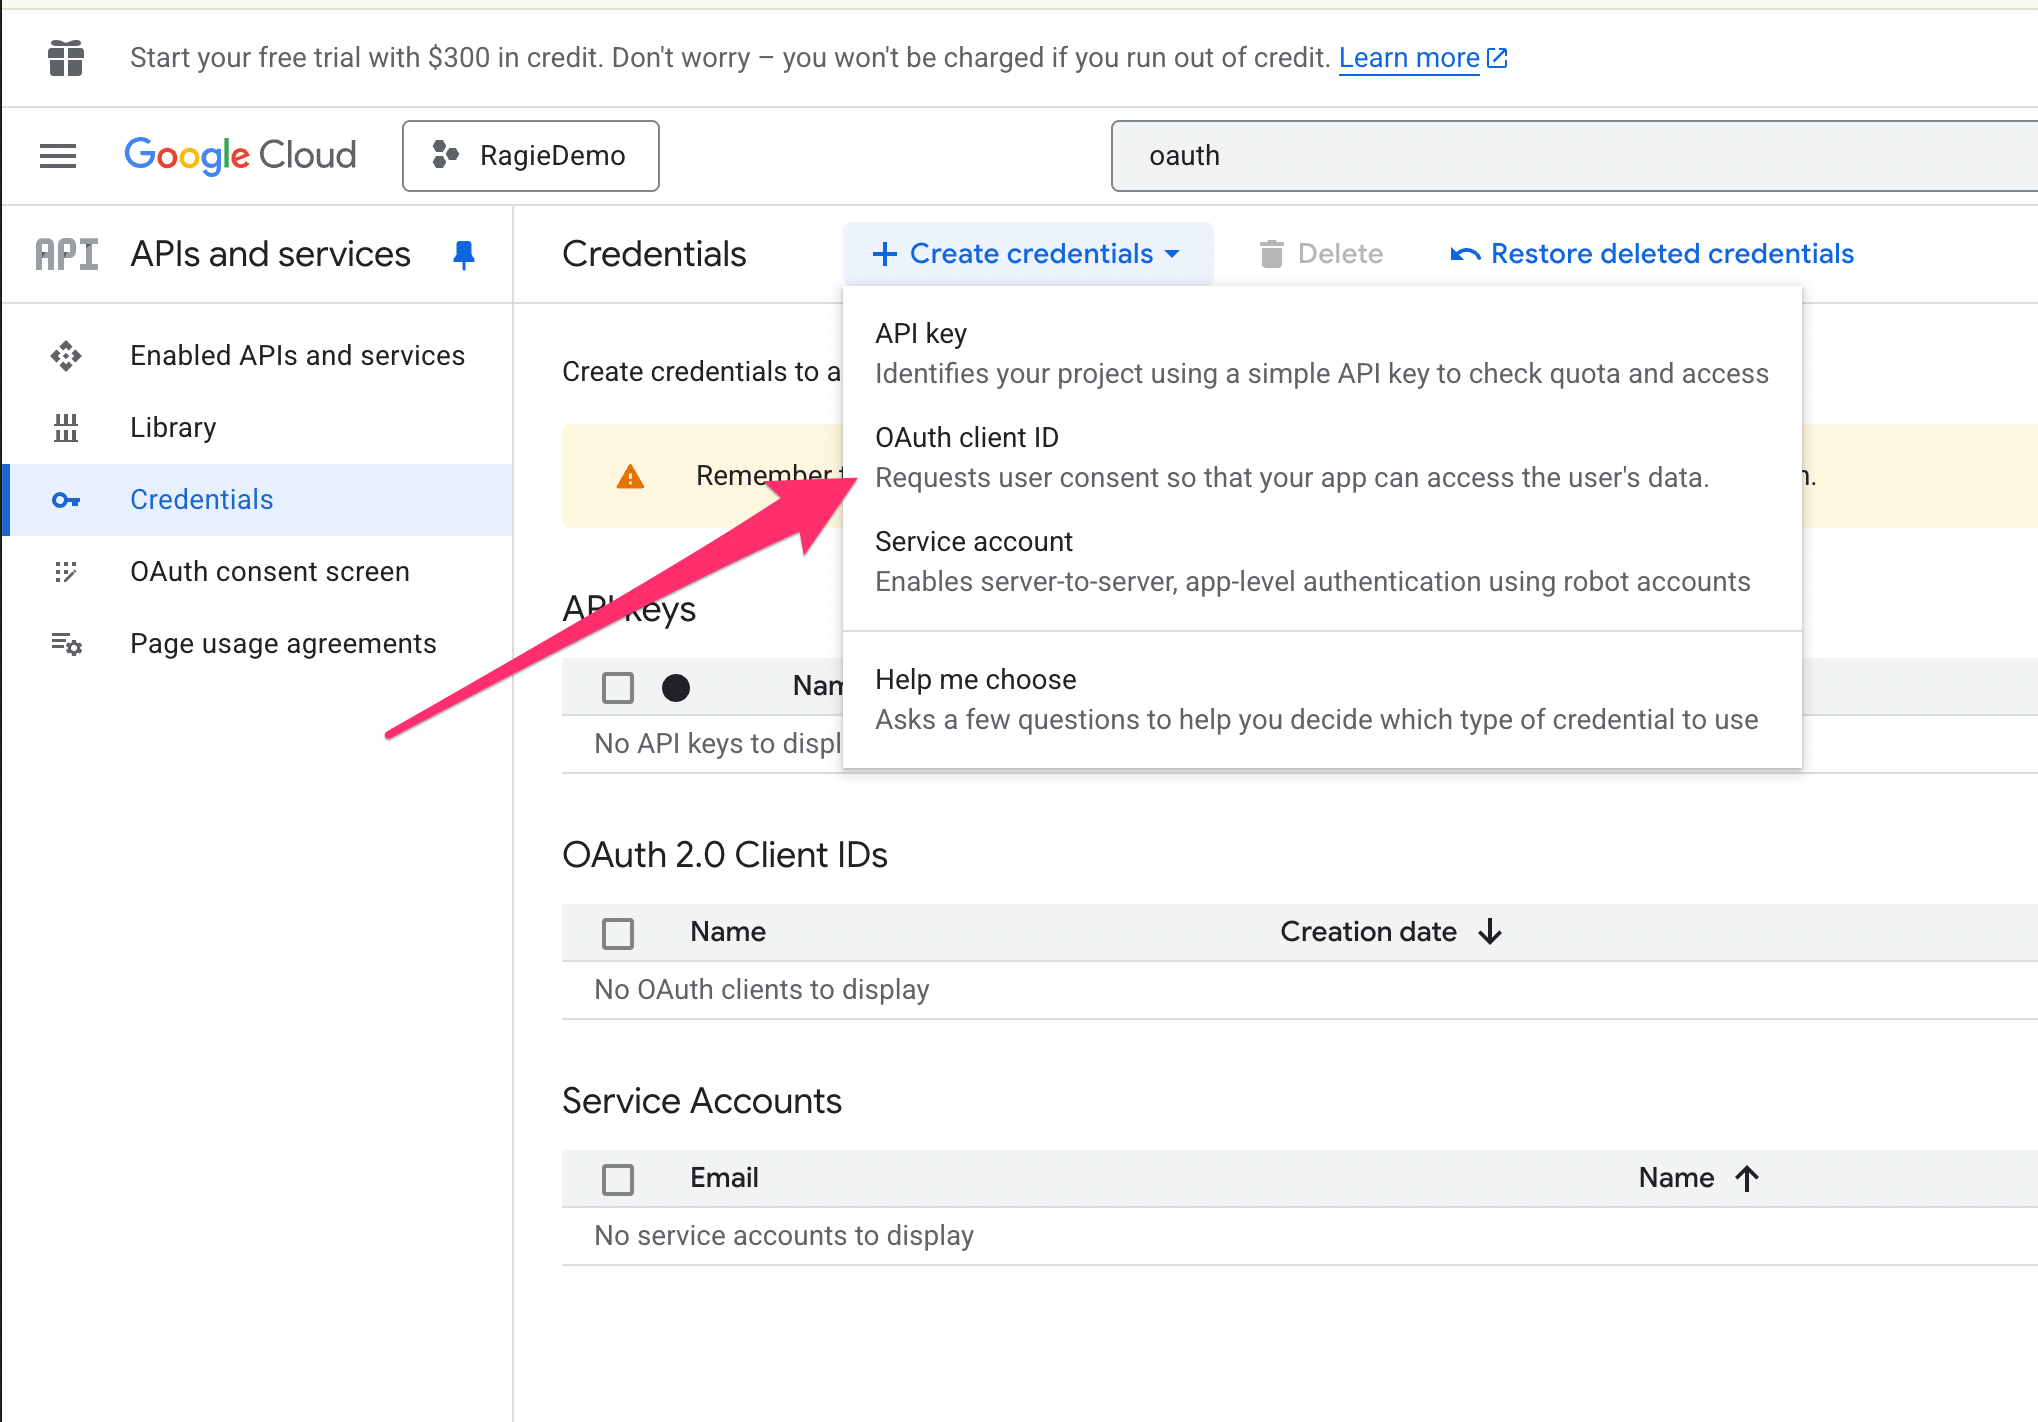
- Search for OAuth and set up a OAuth Client Id
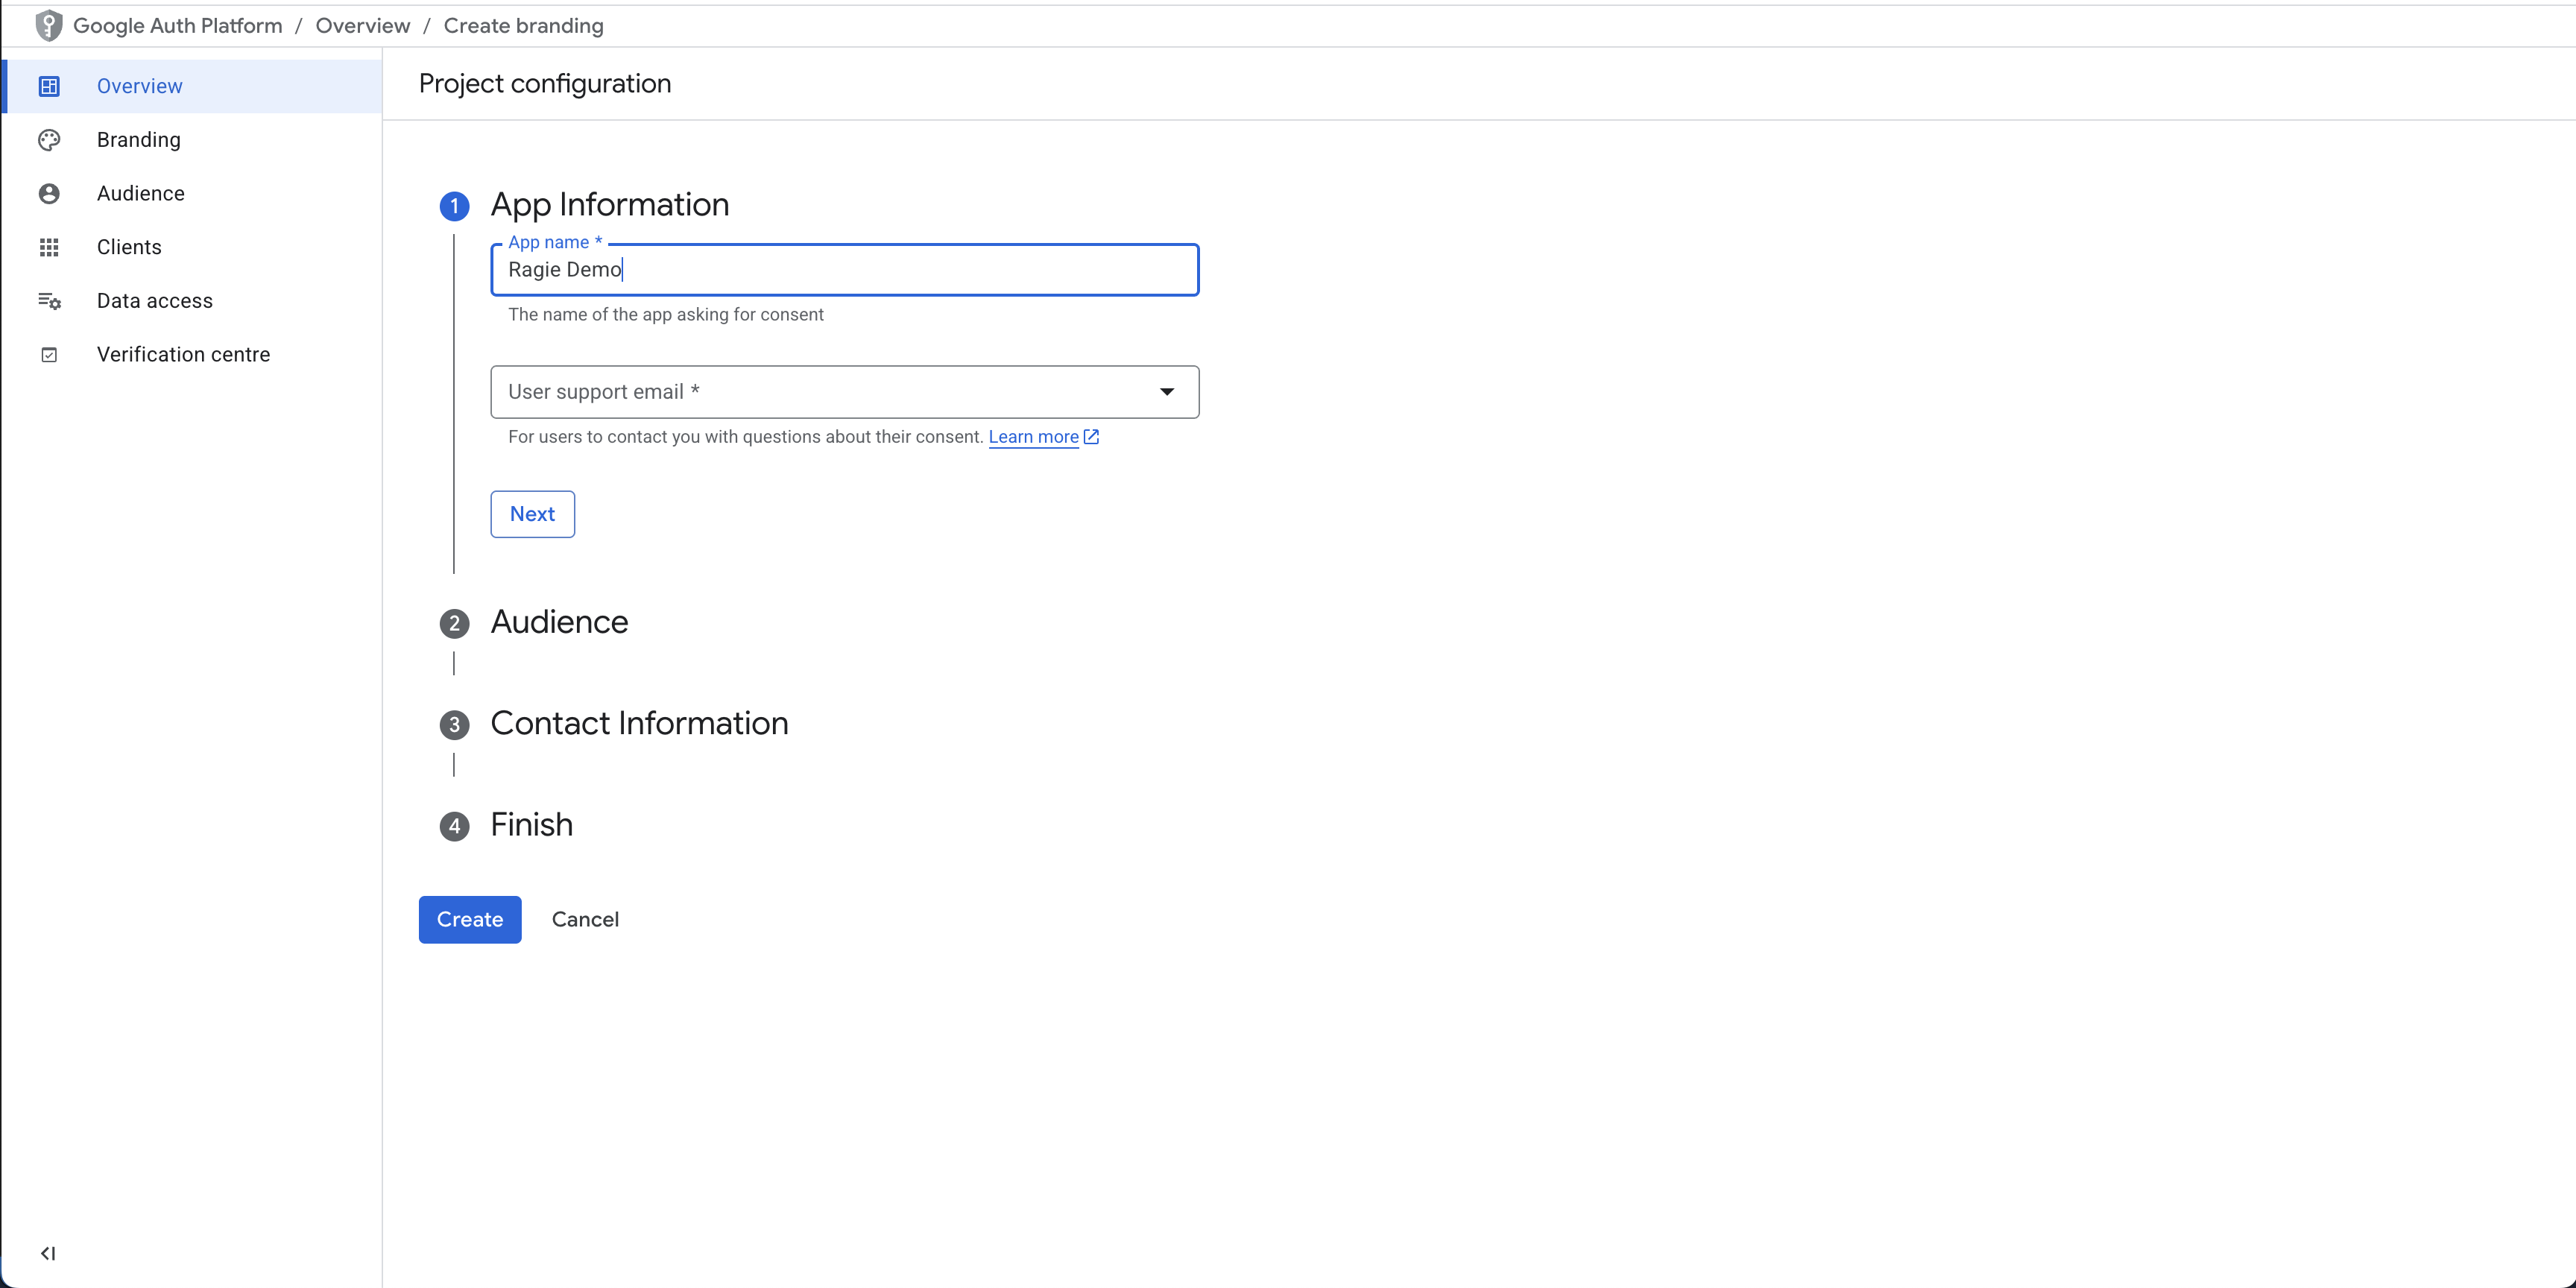
- It will prompt you to first configure an OAuth Consent screen, do that and fill out the fields
- Create an OAuth Client ID
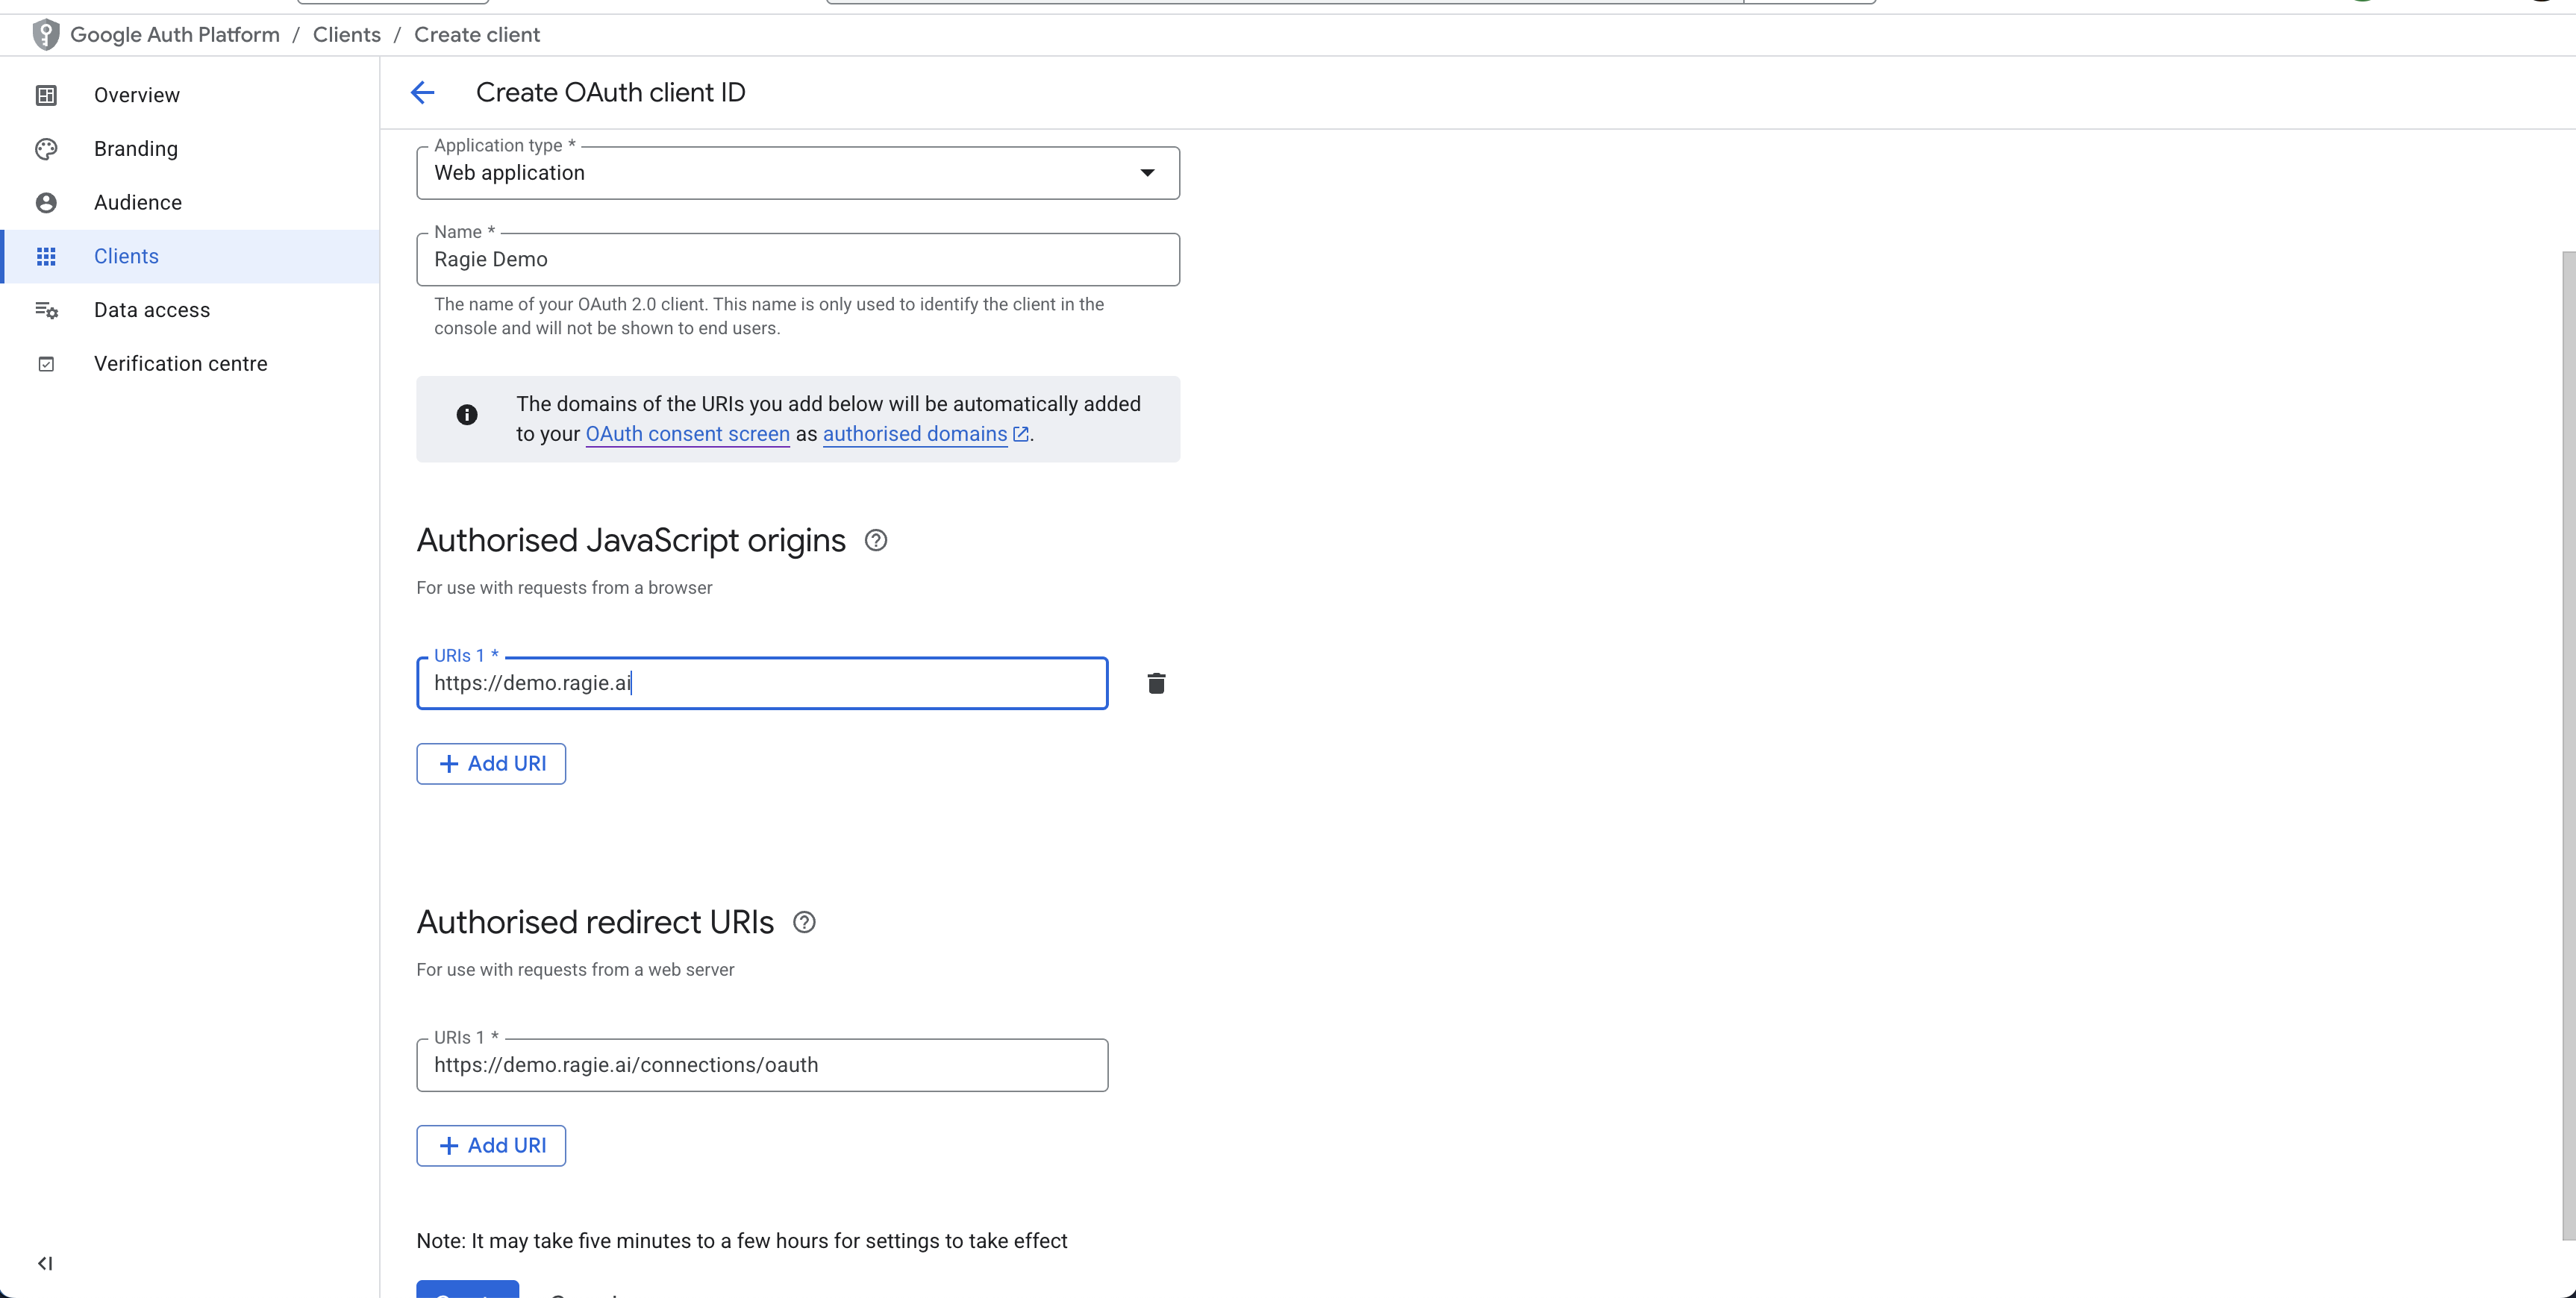
- Choose "Web application" for the Application Type
- Use https://demo.ragie.ai for the Authorized Javascript origins
- Use https://demo.ragie.ai/connections/oauth for the redirect URL
- You will get a Client ID and Secret popup, download those.
You should have the following values now:
- Project number
- Client ID
- Client Secret
Ragie Setup
- Create an authenticator with your google information
curl --location 'https://api.ragie.ai/authenticators' \
--header 'Authorization: Bearer <your_key>' \
--header 'Content-Type: application/json' \
--data '{
  "provider": "google",
  "name": "Ragie Demo",
  "client_id": "client_id",
  "client_secret": "client_secret",
  "project_number": "project_number",
  "domain": "https://demo.ragie.ai"
}'
This will return
{
  "provider": "google",
  "name": "Ragie Demo",
  "id": "b5e77fb7-026c-408f-837a-2bf3b4ba0c6b"
}
Now you can use the OAuth endpoint
curl --location 'https://api.ragie.ai/connections/oauth' \
--header 'Authorization: Bearer <your_key>' \
--header 'Content-Type: application/json' \
--data '{
  "redirect_uri": "<Your redirect url>",
  "partition": "google_files",
  "source_type": "google_drive",
  "metadata": {},
  "mode": "hi_res",
  "theme": "system",
  "page_limit": 100,
  "authenticator_id": "b5e77fb7-026c-408f-837a-2bf3b4ba0c6b"
}'
This returns a url in a JSON object that you can use to authenticate
{
  "url": "https://connect.staging.ragie.ai/embed/connect?auth=some_long_string"
}
Notes
- You will need to contact Ragie to set up a subdomain.
- The Project Number is an optional field for creating an Authenticator, make sure you add it.
- If you change your GCP credentials or OAuth data, it can take a few minutes for the changes to propagate. Try waiting five minutes before any further attempts
- If your Google OAuth app is not in production mode and gone through the verification process, your app name will not show. See this page for information App info, app name.
The app name will be displayed on the OAuth consent screen only if your app has been verified. See the OAuth App Verification Help Center page for details on the verification process.
Updated 8 months ago